The following links contain information which might be helpful in performing this installation – I’ve included them here for reference……
http://php.net/manual/en/install.windows.iis7.php
http://wiki.resourcespace.org/index.php/Installing_on_Windows_Server_2008_R2_64-bit
From the web:
According to IIS.net…
…the FastCGI component enables popular application frameworks like PHP be hosted on the IIS web server in a high-performance and reliable way.
Mike Volodarsky, a program manager on Microsoft’s IIS team, has expressed the following on his blog about why using PHP with FastCGI is the prefered method over ISAPI:
The main reason why ISAPI is not an adequate solution is the lack of thread safety in many popular PHP extensions. The PHP core itself is thread safe, and so are some of the extensions, so its possible that some applications will work correctly in the ISAPI environment. However, many production environments do experience instability with the ISAPI.
So that being said, let’s take a look at how to install configure the FastCGI extension to work with PHP 5.
Installing FastCGI PHP on Windows Server 2008
As opposed to previous versions of Windows Server, the FastCGi module is already bundled with Windows Server 2008 so you don’t have to install it.
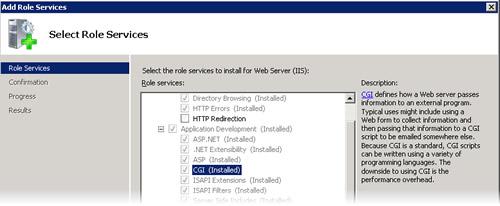
First of all, let’s make sure that the CGI role service is installed. Click on Start => Programs => Administrative Tools => Server Manager. Expand Roles, right-click on Web Server (IIS) and select Add Role Services. Make sure that CGI is checked and if not proceed with its installation.
Next head over to PHP.net’ download page and download the PHP Non-thread-safe Win32 binaries. At the time of this writing, the latest version of PHP is 5.2.5. Extract the content from the PHP archive into c:\php.
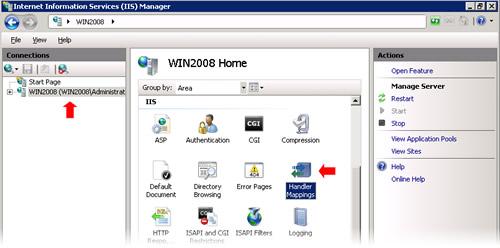
Launch the Internet Information Server Manager by clicking on Start => Programs => Administrative Tools => Internet Information Server Manager. Select your server from the left panel and then double-click on the Handler Mappings icon.
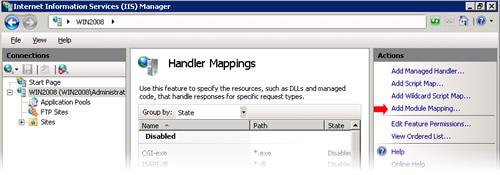
Click on Add Module Mapping from the right column:
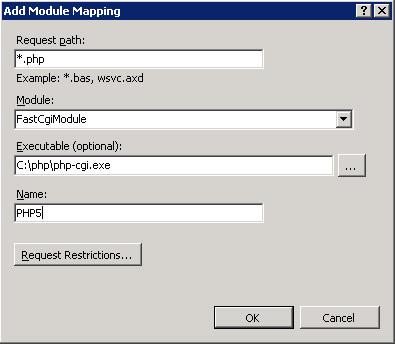
Fill-in the PHP module mapping information as illustrated below and click on OK when done:
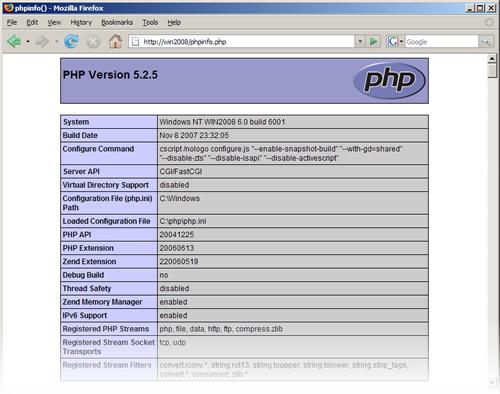
At this point PHP should now be working even though there no php.ini configuration file yet. To find out if PHP files are parsed correctly, create a new file at the root of website’s folder and name it phpinfo.php. Insert the following content into the file and save it:
<?php phpinfo(); ?>
Now try pointing your web browser to http://yourserver.com/phpinfo.php. If everything works properly you should see this page:
Configuring PHP
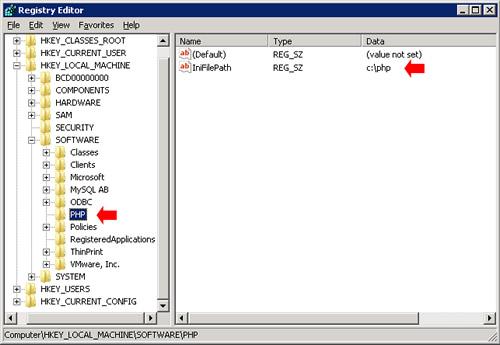
By default, IIS will look for PHP’s configuration file (php.ini) in c:\windows. To change this, launch the registry editor (Start => Run => regedit) and add a new key named PHP in HKEY_LOCAL_MACHINE\SOFTWARE\. Under the newly created key, create a new value named IniFilePath and set its value data to c:\php.
Close the registry editor when you’re done. Using the Windows Explorer, rename c:\php\php.ini-recommended to c:\php\php.ini and open it with your favorite text editor (no word processor). Find the extension_dir parameter and set its value to “c:\php\ext”. You might also want to uncomment extension=php_mysqli.dll and / or extension=php_mssql.dll if you plan to use MySQL or MS-SQL.
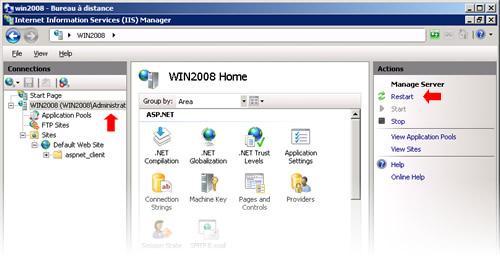
Once you’re done editing PHP’s configuration file, save it and close your file editor. You will need to restart IIS in order to apply the changes. This can be done through the IIS Manager:
I’ll try to perform some benchmark test to see how this setup compares to using php5isapi.dll.