By the way, like a knucklehead I am always referring to this setup as a “LAMP” setup which it is not – the “L”, there, connotes Linux and this (obviously) is on XP….uhm, therefore no Linux. It is, more accurately, a custom WAMP setup – but, very much in the style of a similar setup on Linux. Whatever.
So I was sitting at work – which is a mattress warehouse/store where I have a lot of idle time – and decided I wanted to fool with web stuff running on my local computer. In other words, I wanted to install Apache, PHP, MySQL, Phpmyadmin, Webalizer, etc. on Windows XP. I could have used something called the WAMP server bundle (or the XAMPP server bundle), which are pre-made binarys, but I’d fooled with them before and found them to be kinda buggy – and I didn’t need some of the things which they include (I know XAMPP includes perl). By the way, the download that’s on this page includes Active Perl in a folder called “EXTRAS”. You can install it if you want to… The perl installation is completely straightforward (as in hit next, next, etc.), and my little installation – when finished – is configured with .cgi and .pl extensions enabled – so perl scripts will work. In fact, there’s a web tracking program – written in perl – that’s already in your cgi-bin directory. Install perl and – wahoo – it’s functional. I’ll document this later but, sufficing an even more lengthy explanation, you can download this zip archive (instructions are included – and it’s all very, very simple) and have a fairly full-blown LAMP server running in a couple of minutes. There’s a link below that shows my server running from work (if I haven’t been fired) and a link for downloading the zip archive with the components. I’ve added the instructions to the bottom of this page, as well.
Overview
First of all, when this is all done – and it takes all of about 3 minutes – you will have a local web site located at www.webputzer.com and a secondary virtual domain located at virtualhost2.com. Your computer will find these locations thanks to a little batch file I’ve included which simply copies some files around your computer and echoes a couple of lines to your system’s hosts file. I actually own a domain called Webputzer.com and, well, you don’t. So, why does this deal give my local web site this meaningless name? The idea here is to provide someone who doesn’t know much about all of this with a framework so that they can see how Apache, and virtual hosts, are configured. All you need to do to make your site have it’s own name (call it whatever you like) is edit the httpd-vhosts.conf file located at:
C:\Program Files\Apache Software Foundation\Apache2.2\conf\extra\httpd-vhosts.conf
Open the above file with a text editor and find the lines that define the domain name; change them, restart Apache, and your sites have different names. It’s that easy. And if you’re new to all of this please be advised that if you change the name of your site to mydomain.com (or whatever) you’ll have to add entries in your hosts file that look like this (or you won’t be able to access the site from your local browser):
127.0.0.1 www.mydomain.com
127.0.0.1 mydomain.com
By the way, your hosts file – on Windows XP – is located at:
C:\WINDOWS\system32\drivers\etc\hosts
What’s happening here is this: your computer always knows itself by the IP number “127.0.0.1”. And, by adding these type of edits to your hosts file, your telling the computer to look at the local computer to find an associated domain name. That’s it.
Components
- APACHE 2.2.17
- PHP 5.2.9
- MySQL 5.5.16
- The GD library
- Phpmyadmin 3.4.0
- Webalizer
- Some desktop shortcuts to start and stop things, access mySQL, run Webalizer, etc.
Installation – a 3 or 4 minute affair
There are numbered folders – just, uhm, start with number one (well…of course).
IMPORTANT: Do not move the batch file in folder number 4 (“4-MOVE_AND_COPY”) to another folder because the batch file needs to find the files it copies in the directory structure as it exists when this thing is unarchived.
It’s incredibly simple and fast. Do this:
- Install MySQL: Just double-click and hit next, next, next, etc. – just two things to do, here: Choose a standard configuration (unless you know what you’re doing), and, enter a password that you’ll remember. Follow the prompts, and finish the install – that’s it. NOTE: When you enter a password it will also ask you if you want to enable root access from another machine. This is at your discretion – you can enter yes, or, no (for most people this really doesn’t mean a thing, one way or the other).
- The GD library: Just run the installer – the options are completely inconsequential. It’s very straightforward.
- Install Apache: Again, not much to do here. Do a typical installation. It will ask you for a host and domain name – I just enter localhost and www.localhost.com – this stuff doesn’t even matter as things are going to get copied over anyway. It also asks you for an email address – enter anything.
- Install Perl (optional): If you want perl scripts to work you’ll need this. Not much to say, again, here. Just run the installer – as I recall, there are not any meaningful options – it’s really just NEXT > NEXT > NEXT, etc….
- BATCH FILE: IMPORTANT: Do NOT move the batch file out of the directory in which you find it; if you do, the paths will not work and it won’t find the files it needs to move and copy (which reside in the “files” folder, directly beneath the batch file). Anyway, what’s all this about? There are some .dll files that need to be copied around the computer. Doing them one by one is just a nuisance – so just double-click the “MOVE_STUFF.bat” batch file to move and copy things. This also echos “127.0.0.1 www.webputzer.com” to your hosts file. And, it makes your new home page a PHP info page (displaying info about your server and it’s PHP setup). Finally – as I recall – it places phpmyadmin in the your root document directory.By the way, batch files can contain all kinds of bad things – you can open this with a text editor to verify that it just copies some files. And, you can do the things manually….if you’ve got time on your hands and wanna make things considerably more involved. As a general rule, be careful about running batch files from unknown sources as they could overwrite Windows system files, install a root kit, etc. This one just moves a few .dll files to your system32 folder and your Apache bin folder so that MySQL will work with Apache (and does a bit of house cleaning).
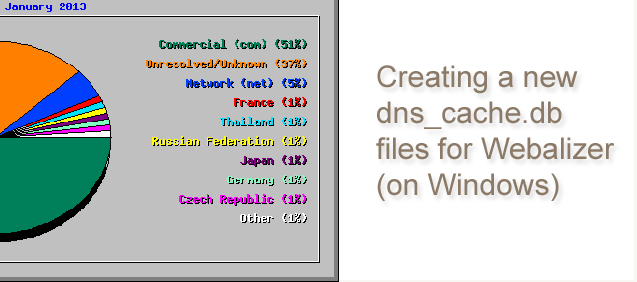
- All done! You can copy the “SERVER SHORTCUTS” folder located at “EXTRAS\SERVER SHORTCUTS” to your desktop. Double-click the “Restart Apache” shortcut. After you’ve restarted Apache, go here: webputzer.com. After you’ve hit your website (at least once) you can generate a Webalizer report by double-clicking the “Run_Webalizer” shortcut in the EXTRAS folder; then, use the internet shortcut to view your Webalizer report. It’s a fast install, but, pretty full featured.
Notes & Configuration
Obviously, there are a lot of configuration options with things like Apache, PHP, Webalizer, etc. I am going to omit detailed explanations of how these things are configured – that’s why God made Google. Just be aware that your webalizer configuration is loaded from C:\webalizer\weblizer.conf (there are lots of options) and PHP is controlled by the php.ini file located at C:\php\php.ini.
If you want people to be able to find your server you need to (1) set a static IP on Windows XP (see Google – it’ simple), and, (2) open port 80 on any routers you may have to point to your computer’s network IP. If you own a domain name you can edit the virtual host configuration in Apache (using your real domain name, or names), and, edit the settings in your domain manager (eg. at GoDaddy, or wherever) to point the domain at your global IP address. Your are now all the way live.
The end.
Screenshots of included add-ons:

